

Tag Manager Installation on WordPress
This is an easy to follow guide to setting up Google Tag Manager on WordPress. You will need to be able to log in to your wordpress site with permissions to install plugins.
This will take about 5 minutes to do and is beginner friendly.
So let’s get started
1. Log in to your website (/wp-admin).
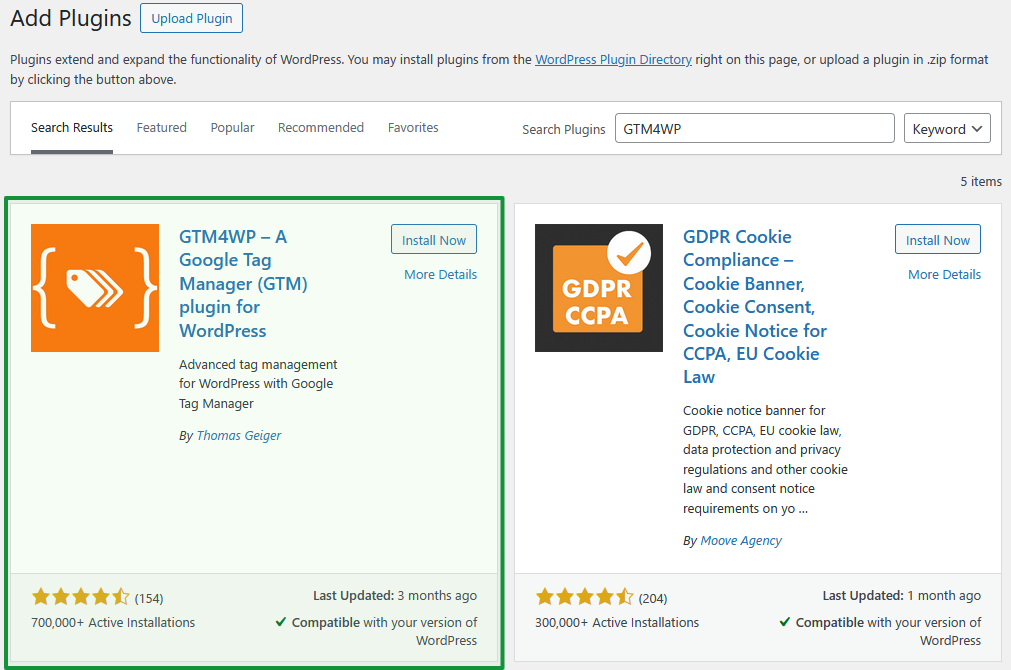
2. Find and install the GTM4WP plugin by Thomas Geiger. Below is a link directly to a search with the plugin as the first result. You can manually navigate there from the Worpress Dashboard. In the sidebar click Plugins, then click Add plugin at the top, and search for GTM4WP.
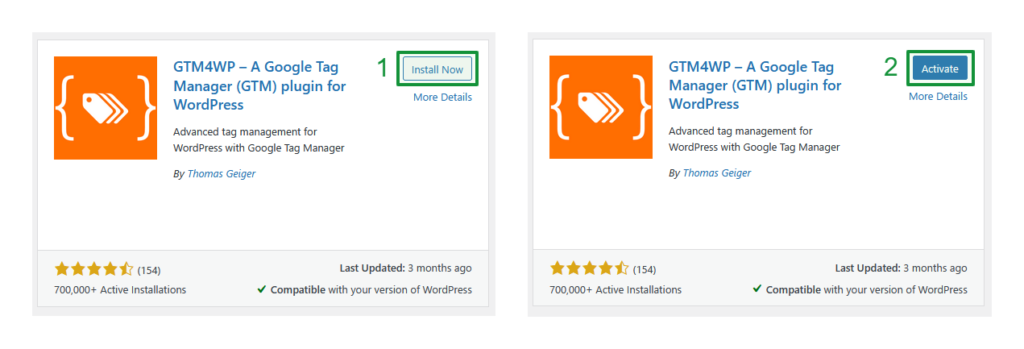
To install the Plugin. Click Install now, then click activate:
3. Configure the extension. Below is a link to the configuration page, to get there manually look under Settings > Google Tag Manager in the wordpress sidepanel:
You will see the configuration screen like below (if it looks broken this can be a common sideffect of having an ad-blocker enabled, temporarily disable it for this setup):
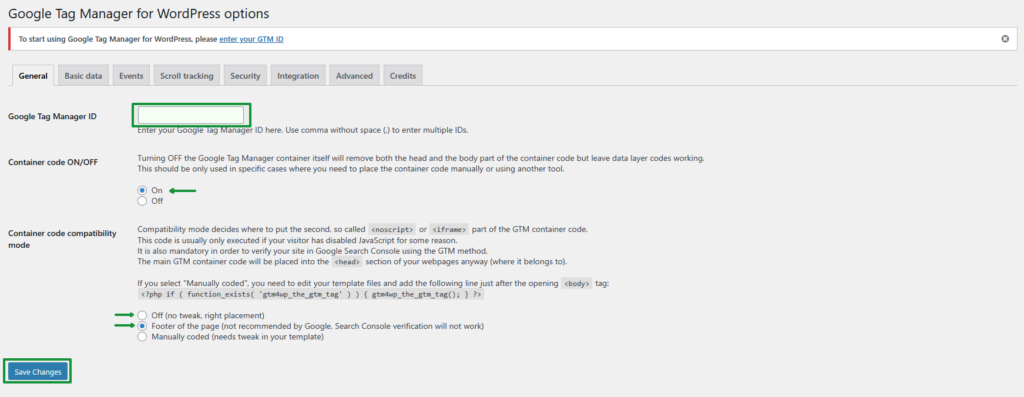
- Enter in your Google Tag Manager ID (provided below):
- Container code ON/OFF is set to ON.
- Container code compatibility set to Footer of the page or Off
Then click Save changes
IMPORTANT: Often the Container code ON/OFF setting doesn't save the first time, please check it is still ON after saving.
After that you are all done!